6 Essential Parts of a Planted CO2 Setup
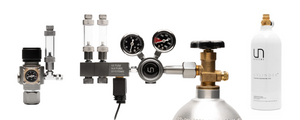
When it comes to setting up a Co2 system it can get confusing. With innovation always being pushed, the amount of product on the market makes for saturation. With this blog the hope is to clarify the essentials when it comes down to injecting co2 into your planted aquarium. There are six basic fundamental pieces you need when jumping into the world of pressurized co2. Those being: A CO2 Cylinder, regulator, co2 proof tubing, check valve, bubble counter and lastly a diffuser.
Below we will break down the key function to help you better understand the role of each piece.
- CO2 CYLINDER: This can range from a simple paintball ball co2 tank up to a 20lb cylinder. You want to choose what best fits your setup. The bigger you go, the less you will have to refill. While smaller choices can be hidden easier.
- Regulator: As I mentioned earlier in the blog, we are very fortunate to have so much equipment to choose from. With so many options, a regulator for every budget is available. From very expensive dual stage to simple paintball regulators. Preferably what you want is a regulator that has a solenoid, a small electronically driven device that is attached to your regulator. This will allow you to plug it in to an outlet timer and have control of when it comes on and off.

- Tubing: Your safest bet is to go with what is known in this hobby as, “CO2 proof tubing”. When comparing this against, “airline tubing”, you will instantly notice the stiffness. The harder tubing will allow you to hold a higher pressure without bursting your line. Also, prevents any leaking of gas through the material. Airline tubing is made form a softer material, silicone, which in turn causes for co2 to leak through it. While you can use silicone tubing, we suggest going on the safe side and using co2 proof.

- Check Valve: Next up on our list is a very handy little object that will potentially save your equipment. I mentioned earlier that a solenoid is an electrical component. We all know that water and electricity do not mix well. A check valve prevents just that. This nifty part creates a stop when water is siphoned back from the tank through tubing. This valve stops water from going back into the solenoid and damaging it.
PRO TIP: Install one check valve two inches away from your regulator and one right under your bubble counter. A back up just in case one fails.

- Bubble counter: A handy tool when it comes to determining how much CO2 is going into your tank. A higher rate will let you know that there is a large amount being injecting into your aquascape, while a slower motion of bubbles passing through will mean a far less amount is being introduced. This is controlled through your fine adjustment, “needle valve”, on your regulator.

- Diffuser: Again, a piece that is largely available in many different types of shapes and materials. The key point to look for in a diffuser is the ability to produce very fine mist. This not only saves you CO2, but it also makes getting a higher concentration of the gas in your water easier.

Once broken down, setting up a system to inject CO2 is very simple. While not necessary, very lush and rapid growth in your fresh water planted aquarium can be achieved with introducing this gas into your aquascape.
CO2 TANK->REGULATOR ->TUBING->C.V.->BUBBLE COUNTER->DIFFUSER
If you have any further questions or comments please be sure to reach out to us. We will be glad to try and answer any questions you may have!
Tell us - Was this article helpful? Please leave a comment below!
If you have any questions regarding this article, please DM us on Instagram, Facebook, or email support@buceplant.com so we can assist you - @buceplant


Comments
Leave a comment