


How to Add CO2 to Your Planted Aquarium
Written by: Team BP & Anne (expertaquarist)
If you just recently established your planted aquarium then I’m sure you are thinking, “how do I get my aquatic plants to grow as fast & healthy as possible?”
You need a CO2 setup to make it a reality. CO2 might be lethal for us humans but it is the key to life for plants.
CO2 is the biggest benefactor of photosynthesis, which is the way of survival for plant life. You can grow your aquatic plants in your aquascape 5-10 times faster by supplementing CO2.
This is one benefit, but there are plenty more that come with using CO2 in a planted aquarium. Excited to find out? Then please keep reading!
This article will include:
- A brief overview of why CO2 is important for your aquatic plants
- The different types of CO2 setups
- An easy how-to guide on how to setup pressurized CO2
- Must-read CO2 tips

Why do you need CO2?
To understand the importance of CO2 in planted aquariums, we need to go through a little boring science talk. I know you didn’t come here for a science class, but please read it with undivided attention for your tank’s sake.
They need it for the process of photosynthesis, in which they use light, water, and CO2 to make sugar and oxygen. Chemical potential energy is stored in sugar molecules that help in their respiration and growth.
Plants with great carbon affinity have shown faster growth rates compared to the opposite. By supplementing CO2, you can grow your plants much faster and healthier.
Thanks to the fish respiration and organic breakdown alongside surface agitation, there is enough CO2 for a low light/low tech aquarium, so they don’t necessarily need extra; however, adding more would show better results.
But for medium/high lighting, there is no other option but to introduce CO2. This conundrum makes CO2 injection vital for the growth of your plants.

High tech plants and CO2 injection
High tech, a fancy word! It doesn’t mean you need giant and expensive components, rather the impact of said components has to be huge. Aquatic plants in a high tech tank need CO2 injection, why? I’ll explain it below.
Healthy Growth
Plants that are deemed high tech are commonly defined as those which demand strong lighting. Going along with that definition, a high-tech tank would need lots of CO2 as it shares a direct relationship with lighting intensity, or the plants simply won’t grow properly. Ultimately, adding CO2 to your tank will result in faster and more vibrant growth of your aquatic plants.
Balanced CO2
More lighting means the plants grow quicker, so there is more demand for resources. Sadly, CO2 doesn’t dissolve from the air into the water as quickly as plants use it up due to various factors; hence, there is no equilibrium. Therefore, this needs to be accomplished with CO2 injection so that the balance isn’t broken. Because of this, adding CO2 to your planted aquarium may also result in less algae in the aquarium.
Color Intensity
When you inject CO2, it will have that desirable effect on your plants’ coloration.
For example, suppose you want a vibrant color from a red aquatic plant; however, it is unachievable without CO2 injection. Some low lighting plants might be able to grow like that, but the difference in color intensity will be clear as day.
So, high tech plants need CO2 injection if you want them to look vibrant, lively, and lustrous.
Better Carpet Development
Many aquarists love having carpet plants. They look fabulous inside a well-lit tank. Although, in order to achieve that lush carpet, aquatic carpet plants demand a lot of CO2 to grow well.
If you have a tank with high lighting and your carpet growing effort is not going as you wanted, the reason is most likely low CO2.
I believe these intricacies will give you a better insight into why CO2 injectors are so crucial for a planted aquarium.
-
Note: Keep in mind that high CO2 concentration could cause issues for the inhabitants. Do the proper research on your fishy friends before adding CO2 injection to your planted aquarium.

CO2 injection methods
There are a couple methods by which you can add a CO2 setup to your aquarium. We will briefly explain each setup for you (Click the names to view products)
1. Pressurized CO2
2. DIY CO2
Pressurized CO2
Pressurized CO2 is the most common way to inject CO2 in the aquascaping hobby. These setups are sustainable, and most importantly, can be simple to set up. All you need to do is assemble the parts properly and open the valves at the right time.
Here is the required equipment described. Below we will have a setup guide.
Required Equipment:
- Regulator - This will initially introduce CO2 during the injection process. They have a gauge that tells you how much pressure is going in while adjusting that with a knob. Tanks exert CO2 rapidly, and having a regulator will slow it down to one bubble at a time. Check out CO2 Regulators HERE.
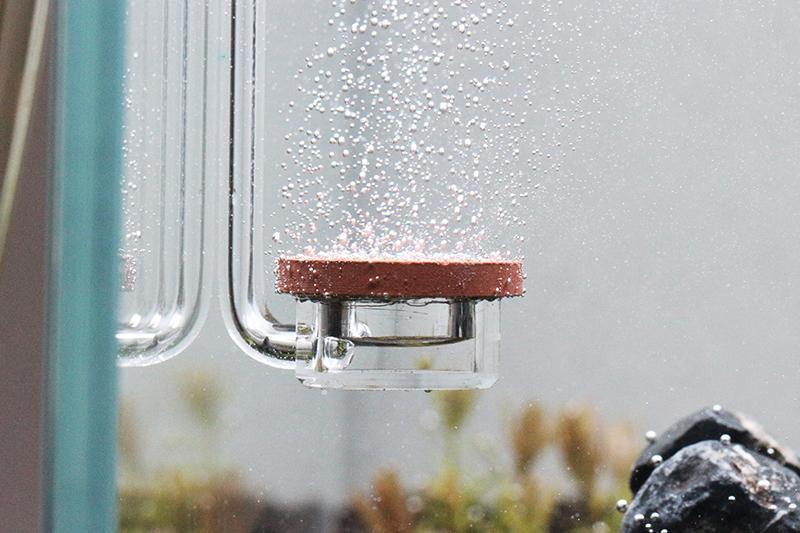
- Diffuser - This allows CO2 to enter your planted tank effectively. A porous medium will break down gaseous CO2 into misty bubbles, making it easy for your aquarium to absorb them. It is best to position your diffuser opposite of the outlet because the flow from the filter will push the bubbles throughout the water column for better diffusion. Check out a great selection of diffusers HERE.
- Bubble Counter - It’ll monitor the bubbles you are injecting through the regulator. This is external equipment that you will have to add to your filter tubing.
- Drop Checker - This specialized kit measures how much CO2 has been diffused in water. It is like a vessel with a solution named bromothymol blue that changes color depending on the CO2 concentration in your aquarium. You want the color of the liquid to be GREEN which indicates the concentration is ideal.
-
Solenoid - Aquarists love solenoid. They are affordable and efficient, exactly what you want in your aquarium. When the lights are off, plants don’t take part in photosynthesis, so there is not much of a need for CO2 at that time.
But you can’t always be physically standing by your aquarium to turn it off manually. If you use a solenoid valve and an electric timer, you can turn off the CO2 influx at the right time.
These components are a must to build a CO2 injector. While all of these aren’t hard to find, you will spend quite a while going to different places to get them. - Tubing - You need this to connect your regulator and diffuser. Be sure to purchase tubing that is meant for CO2 because regular tubing allows CO2 to leak out. Buce Plant has CO2 tubing HERE.
- Spanner - A spanner is a type of wrench used to tighten up the regulator to prevent leakage.
- CO2 Tank - They come in different sizes, but I’ll suggest you go for a large one to save money and have more CO2 in the long run. CO2 tanks, sodaline bottles, and paintball CO2 tanks are all options for a pressurized setup. Be sure to purchase the correct adapter to fit the regulator onto these tanks.
Be sure to purchase CO2 equipment from a trustworthy source. I recommend products from the Buce Plant CO2 collection which has fantastic equipment and devices to get you up to speed. Buce Plant offers unique bundles that will include the beautiful regulator, bubble counter, drop checker, and solenoid.

Click here for UNS PRO Dual Stage CO2 Regulator
DIY
The DIY option is a good choice for people that want to give CO2 a try before investing a large amount of money into pressurized CO2. We recommend using the Aquario Neo CO2 DIY Kit, as they are reliable and affordable. You can check out the set up video on the product page HERE.
Required Equipment:
- A bottle
- Tubing (Vinyl or silicon)
- Suction cup
- Diffuser
- Scissors
- Check valve
- Sugar
- Water
- Yeast
- Airstone
Although the DIY way is great for beginners with nano rimless aquariums, you still want the best possible growth and health of your aquatic plants. It may be best to eventually open your wallet a little.

Click here for Aquario NEO CO2 DIY Kit
Pressurized CO2 setup – the easy step guide
Although the thought of injecting CO2 in your aquarium might sound very daunting, the process is fairly simple. We have even included an easy How To Setup Video for Buce Plant’s UNS Pro Dual Stage CO2 Regulator:
Pressurized CO2 Setup Step Guide
After you’ve gathered all the equipment, this is the main event. Once you know how to do it, you’ll have your setup running in seconds. Follow these steps accordingly:
- You start off by connecting all the components together. Follow this arrangement to get it done easily- Tighten the regulator with a spanner and attach it to the CO2 tank. Place the diffuser inside the tank, and make sure it is placed properly. Connect the diffuser and bubble counter with a CO2 resistant tubing. Attach a solenoid valve to the regulator if the solenoid is separate from the regulator
- When all the parts are connected, you move to the next phase. First, slightly open the needle valve that is on your regulator. This will make sure no harm happens to your solenoid when the main valve of the bottle is released.
- Now you can switch on the main valve of the bottle to release CO2. If the bottle is full, the gauge would indicate 800-1000 psi.
- To release CO2 from your regulator, slowly turn the needle valve and look at the bubble counter to adjust the rate.
- Adjust the needle valve so you can see 1-2 bubbles per second. For larger aquariums, you would need more. The needle valves can be delicate, so be patient when fine tuning.
- Monitor the drop checker for a few hours. Check what color is showing, dark blue means high pH/low CO2 while yellow indicates low pH/high CO2. Adjust the CO2 needle valve until the liquid turns green. You got to keep in mind that the drop checker indicates the CO2 level that was present 1 hour ago. This is because it takes 1 hour to respond to the CO2 level.
- Setup the electric timer so the solenoid can shut off the CO2 regulator. It is recommended to set the timer to turn on 1 hour before lights turn on and turn off 1 hour before the lights turn off.

Balancing Your CO2
Keep in mind that while CO2 is an important component of plant growth, overdosing CO2 will not create better results. Be careful! Over injecting CO2 can cause death to your planted tank inhabitants due to the lack of oxygen. For long-term benefits, a constant concentration of CO2 should be maintained.
The injection rate of CO2 depends on various factors like flow rate, surface volume, number of plants, etc. Drop checkers will help inform you if the tank is deficient or has too much dissolved CO2. Its display of color is safer than calculating pH and KH or using tests because there is less margin of error. Make sure to always keep an eye on your drop checker to prevent under or over dosing.

Must-Read Tips
- Save your CO2 by setting the timer to go off 1 hour before the lights go out. By then, there should be enough CO2 remaining for the last hour of the photoperiod.
- Start the CO2 infusion 1 hour before the lights go on. This will ensure an adequate concentration of CO2 is present when the photoperiod begins because the beginning of the photoperiod is the most important.
- Every tank is different, so you will have to test your bubble counter and schedule a few times to get the green color on your drop checker.
- Experiment with the CO2 levels before you introduce fish in the tank. This way, you avoid any fatality while you are finding your ideal setup.
- Make sure to get a dark green color. Don’t confuse it with a yellow-green tint.
Make Your aquatic plants happy
Now that you know the benefit of using CO2 in a planted aquarium, go give CO2 injection a try! Regardless of whether your planted aquarium is high tech or low tech, your aquatic plants will benefit from CO2 injection in the aquarium. Feel free to check out Buce Plant's extensive selection of CO2 accessories. Feel free to hit them up on Instagram or Facebook with any questions you may have! Have fun and go decorate your aquarium with vivid and stunning aquatic plants.
Tell us - Was this article helpful? Please comment your thoughts below!
If you have any questions regarding this article, please DM us on Instagram, Facebook, or email us directly at support@buceplant.com so we can assist you - @buceplant
Comments
Leave a comment