


8 Step Guide: Glass Lily Pipe Maintenance
Is your planted aquarium pristine all around EXCEPT for your lily pipes? Trust us, you aren’t alone. Many aquascapers (including us at Team BP!) struggle with keeping this prestigious piece of equipment squeaky clean.
However, cleaning your glass lily pipes is not as difficult or time staking as you may think! Follow these 8 easy steps to tank perfection.Scroll to the very bottom of this article for a quick How To Video!

Step 1: Materials Needed
Gather the necessary cleaning equipment:
- Disposable gloves
- Bleach
- Pipe brush
- Two empty containers
- Clean water
- UNS Microfiber Towel (microfiber cloth is recommended)
Carefully remove your lily pipes from your aquarium and examine to make sure they are free of cracks or chips in the glass. In this demonstration we will be cleaning the Dymax Crystal Glass Lily Pipe.


Step 2: Disconnecting the Lily Pipes
Carefully remove your glass lily pipes from the tubing for cleaning.
This can be done by firmly grasping the tubing and glass lily pipe where they meet. Then, gently push the lily pipe in towards the tubing to break the air-tight seal. Once loose, slowly pull the lily pipe and tubing apart by rotating and twisting in a circular motion.


Step 3: Ready to Clean
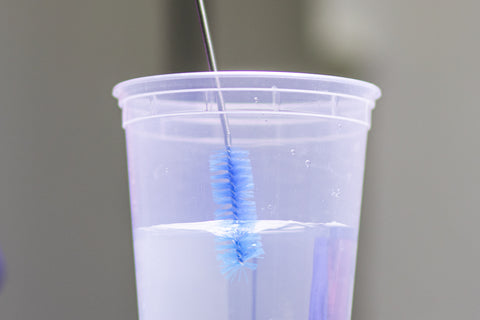
Dip the pipe brush into a clean cup of water. Wetting the pipe brush before cleaning will allow it to move a little easier through your lily pipes.
Gently insert the pipe brush into the outflow part of your lily pipe set. Push the pipe brush slowly through the entire length of the lily pipe with a back and forth motion to clean thoroughly.
- Remember: Be patient and avoid using excessive force! Take your time--you don't want to accidentally break your lily pipe.
Remove the brush and rinse in clean water. Repeat this step until your pipe is clean from debris.

Step 4: Rinse Thoroughly with Water
After you have loosened all of the buildup in the lily pipe using the pipe brush, rinse thoroughly with clean water. Use the microfiber cloth to clean the outflow outlet. A microfiber cloth will help reduce the chances of scratches.


Step 5: One More Time
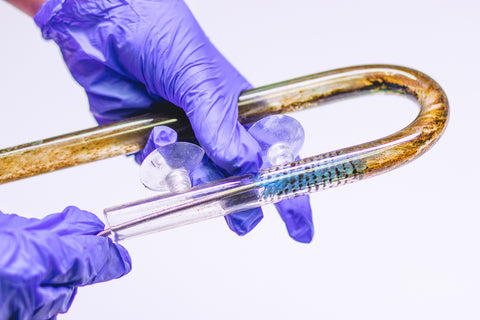
Now it’s time to clean your inflow lily pipe. Repeat the same processes in Step 3 & Step 4.
Dip the brush into clean water and insert the brush into the lily pipe.
Remember to be gentle and patient! Excessive force can result in the lily pipes breaking.

Step 6: Bleach the Tip!
You may have difficulty cleaning the very ends of the lily pipes, but we have a trick for that too. Fill a clean container with enough bleach to soak the entire tip in. You can use a rock as a weight to keep the container from tipping over!
Soak the ends of your lily pipe in the bleach for 5-20 minutes to loosen the algae.


Step 7: Final Touches
Use the pipe brush one more time to remove the last of the loosened buildup.
Then, thoroughly rinse the lily pipe to remove the bleach and leftover debris.


Step 8: Reinstallation
Now that everything is clean, it is time to reassemble everything.
Dip the ends of the glass lily pipe in water to reduce friction for smoother reinstallation. Then, grasp both the tubing and glass lily pipe firmly at the base. Gently push in with a twisting motion to reconnect the tubing and the glass lily pipe. Repeat the process for the other lily pipe.
Once complete, hang both pipes back onto the aquarium and enjoy!


Glass Lily Pipe Maintenance: How To Video
Tell us - Was this article helpful? Please leave a comment below!
If you have any questions regarding this article, please DM us on Instagram, Facebook, or email support@buceplant.com so we can assist you - @buceplant
Leave a comment