The Walstad Method Tank Guide
Written by: Tammy (@aquarist_tl) and Team Buce Plant
What if I told you it’s possible to set up a natural planted tank that does not require regular water changes or even a running filter once established? To many aquarists, this just sounds like a pipe dream, but it's actually quite easy to achieve! You just have to create a balanced ecosystem with aquatic plants and other organisms in your aquarium using the Walstad Method.

Photo credit: @yoshelbey on Instagram
What is the Walstad Method?
Diana Walstad, the technical advisor for the Aquatic Gardeners Association and renowned ecologist, popularized the Walstad Method tank, or the Walstad aquarium, which is more generally known as the “dirted tank.” Diana goes into depth on this concept in her book, "Ecology of the Planted Aquarium," which includes in-depth details on how to setup up a thriving environment.
The Walstad Method is a natural method for making your own balanced aquarium (or ecosystem) that can be almost completely self-sufficient without a filter or regular water changes. A "balanced ecosystem" has fish and aquatic plants that support each other and will not require any CO2 injection or added fertilization. This means both your plants and fish can thrive with very little maintenance- if any at all!
This method will allow you to perform less water changes because the aquarium plants will do the filtering for you. With a Walstad Method tank, you may only have to do a 25-50% water change twice a year (or every 6 months).
Interested in starting your own low-maintenance ecosystem? Keep reading for a step-by-step setup guide for how to set up a Walstad tank.

How It Works
The goal of this technique is to set up an aquarium where the livestock and their environment have a symbiotic relationship that helps each other grow and thrive. A crucial part for this ecosystem to work is aquatic plants. The plants will act as the biological "filter" for the tank, absorbing all of the toxins (e.g. ammonia, nitrates, etc.) that is emitted from fish waste and other decomposing organic matter. While these compounds are toxic to fish and shrimp, they serve as nutrients for plants.
Although, in order for your plants to thrive, they need ALL of their essential nutrients (not just the ones from fish waste). A Walstad tank provides plants with these nutrients through the use of potting soil capped with crushed gravel or natural sand as a two-layer substrate. When setting up the tank, the two layers are used in the aquarium to prevent clouding.
Once the plants are established in the tank, their roots should spread through the gravel/sand cap and reach the soil where most of the nutrients are located. The soil will last long, continuously helping the plants flourish in their environment.

Photo credit: @wally_stad on Instagram
How to Set Up a Walstad Method Tank
1. Prepare the Potting Soil
Soil selection is an important step because (1) there are soils with additives that may kill your livestock (2) too many additives that may cause algae spikes or (3) the soil may lack fertilizers and the plants don’t benefit from it.
The one most recommended for this method is an organic potting soil that is unfertilized, such as Miracle Gro Organic Choice Potting Mix or another generic soil without chemical fertilizers. After you’ve selected your soil, start sifting out larger pieces of it using a sieve or colander. A lot of these larger pieces are portions of wood that will decay once underwater. This would create extra amounts of unwanted ammonia.
- Optional: For aesthetics, cover the sides along the walls of the tank with the sand or gravel you will be using as your cap. This way, the dirt is hidden behind the border of sand/gravel when you view the tank.
2. Add the Soil
Add about 1-2" of soil at the bottom of your tank as the first layer. If the soil you selected has very few to no nutrients, you can add root tabs before adding the soil. If you want to increase the hardness or pH of your water, you can also add in some crushed limestone or other forms of calcium. Once you’ve got all the soil in place, soak it with some water to prevent air bubbles from forming when filling the tank.
3. Cap It
Once the soil is added to the bottom of the aquarium, cap it off with 1" layer of sand or gravel. This layering of substrate will to keep the potting soil in place and prevent it from clouding the water when it’s displaced.
- Note: If you use sand, it's recommended to not to use sand that's too fine. This can prevent some plant roots from reaching the soil or create anaerobic conditions as the dirt can't release gas. Check out UNS Controsand Bora for the right grain size. If you use gravel, you may want to cap with 1.5” of it to ensure no soil will escape the bottom.

Photo credit: @yoshelbey on Instagram
4. Scape It
While the main purpose of the Walstad Method is to create an natural ecosystem, you can still make it look like a masterpiece! Throw in aquascaping driftwood or rocks to mimic scenes found in nature. The livestock will also enjoy swimming through and around the hardscape.
5. Plant It
It's important to PLANT HEAVY! The more aquatic plants there are and the faster they’re growing, the more toxins are absorbed out of the water column, ensuring a safe environment for the fish or shrimp living with them!
If you plant heavily from the start, it will minimize the chances of algae growth. The plants' growth process will take up most of the nutrients, which leaves none for algae to feed off of.
For the Walstad Method, low tech, fast growing, and floating plants are highly recommended. Low tech plants would have an easier time surviving in these conditions, while fast growing plants and floating plants will continuously take up much of the ammonia and nitrates when present. Some specific plants for the Walstad Method are:
Low Tech Plants
Fast Growing Plants
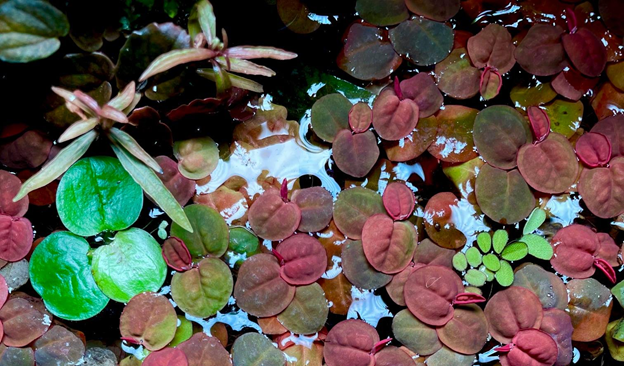
Floating Plants
6. Add LED Lighting
LED lighting is a necessary for your aquatic plants to grow, so make sure there’s one ready to go by the time you finish planting. You should give your plants about 8 hours of moderate light everyday, turning on and off at roughly the same times as the previous day. Consider purchasing a timer for your light if you haven't already! Consistency is important for plants.
- To learn more about aquarium lighting, check out Lighting Requirements for a Planted Aquarium.
7. Water Circulation
Although a filter is not necessary for filtration per se, circulation is important, especially if you continuously experience biofilm in your tank. Biofilm prevents gas exchange and can eventually become harmful to your fauna and flora.
You can increase circulation by using an air stone or filter in order to allow water to flow throughout the tank. If you have a nano tank, circulation is a must in order to disperse all nutrients and CO2 to all the plants. You can increase circulation by adding a small HOB filter, like the Mighty Aquarium HOB Filter, or a surface skimmer. If you're planning on setting up in a smaller glass jar, a filter or air stone may not be necessary.
Hint: The UNS Delta Mini Surface Skimmer is perfect for removing biofilm in Walstad tanks!
8. Cycle the Aquarium
Unlike the typical cycling strategies for normal aquariums, the Walstad Method actually recommends adding fish once the tank is set up. According to this method, the soil should already have bacteria that can break down the fish waste. While this has worked for some, it is recommended to stay cautious. Test the water in the beginning stages of the setup before adding fish.
- Remember: A level of ammonia over 0.0 ppm can be harmful to fauna. A cycled tank should have these parameters:

If you're excited to add fauna to your tank, snails are hardy and can be added within the first week. For other fauna, like fish and shrimp, it's recommended to wait until your tank is fully cycled (~4 weeks) and water parameters represent those above.
The Walstad Method recommends choosing species that remain small are not aggressive. The most popular choices are freshwater shrimp and snails because they can help control excess algae. For fish for nano 10 gallon tanks or less, consider smaller breeds like Tetras, Zebra Danios, or Dwarf Gouramis.
Many people come into this hobby with little knowledge on the cycling process and how to keep their planted aquarium healthy. It's an overwhelming amount of information on different aquatic plants, CO2, lighting, regular water changes, filtration, etc.
Instead, the Walstad Method makes way for a natural approach to balancing your aquarium. With the plants doing all the work, all you need to do is top off the tank once in a while and focus on creating water movement.
Tell us - Was this article helpful? Please leave a comment below!
If you have any questions regarding this article, please DM us on Instagram, Facebook, or email support@buceplant.com so we can assist you - @buceplant


Comments
Leave a comment